
In this tutorial, I will be demonstrating, how we can control servo motors with thumb Joystick and Arduino. We will control two servo motors with the help of Analog Joystick. Before going to understand connections and programming, we will take a brief look at Joystick and servo motor to refresh the basics. We will also study the program for the same. So, let’s learn to control the servo motor with Joystick!
A short note on Joystick
The joystick is a small input device, which can pivots on its base easily. As we know the basics of potentiometers, a joystick simply consists of two potentiometers aligned on X-Axis and Y-Axis. Before going further, let’s have a look at the pinout of a standard Joystick.
Joystick Pinout
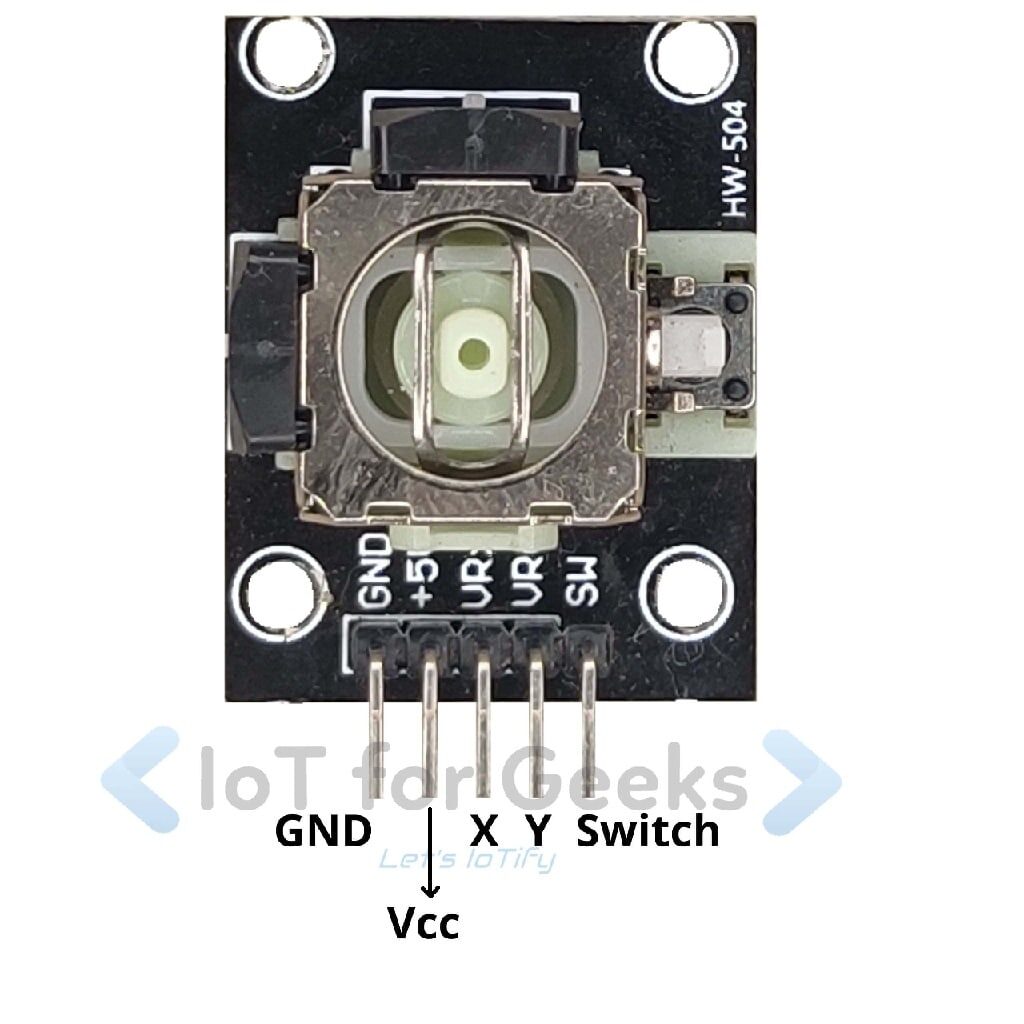
As shown in the figure below, Joystick has 5 pins. The first two pins are Ground and Vcc respectively, where we need to apply a voltage between 3.7v to 6v. The next two pins are for X-Axis and Y-axis. We will learn more about these axes later in this tutorial. The last pin is of switch pin. The joystick has a switch. It gets pressed when you press the shaft.
Joystick Working
As mentioned earlier, the joystick has provided a voltage ranging from 3.7v to 6v. The change in resistance is converted into a change in voltage. Which means, it gives an analog value. This value can be mapped between 0 to 1024. The value 1024 depends on the resolution of the ADC your microcontroller has. In the case of Arduino, it has 10 bit ADC. Hence the analog value can be mapped from 0 to 1024. Now, let’s see the output pattern of the position of Joystick.
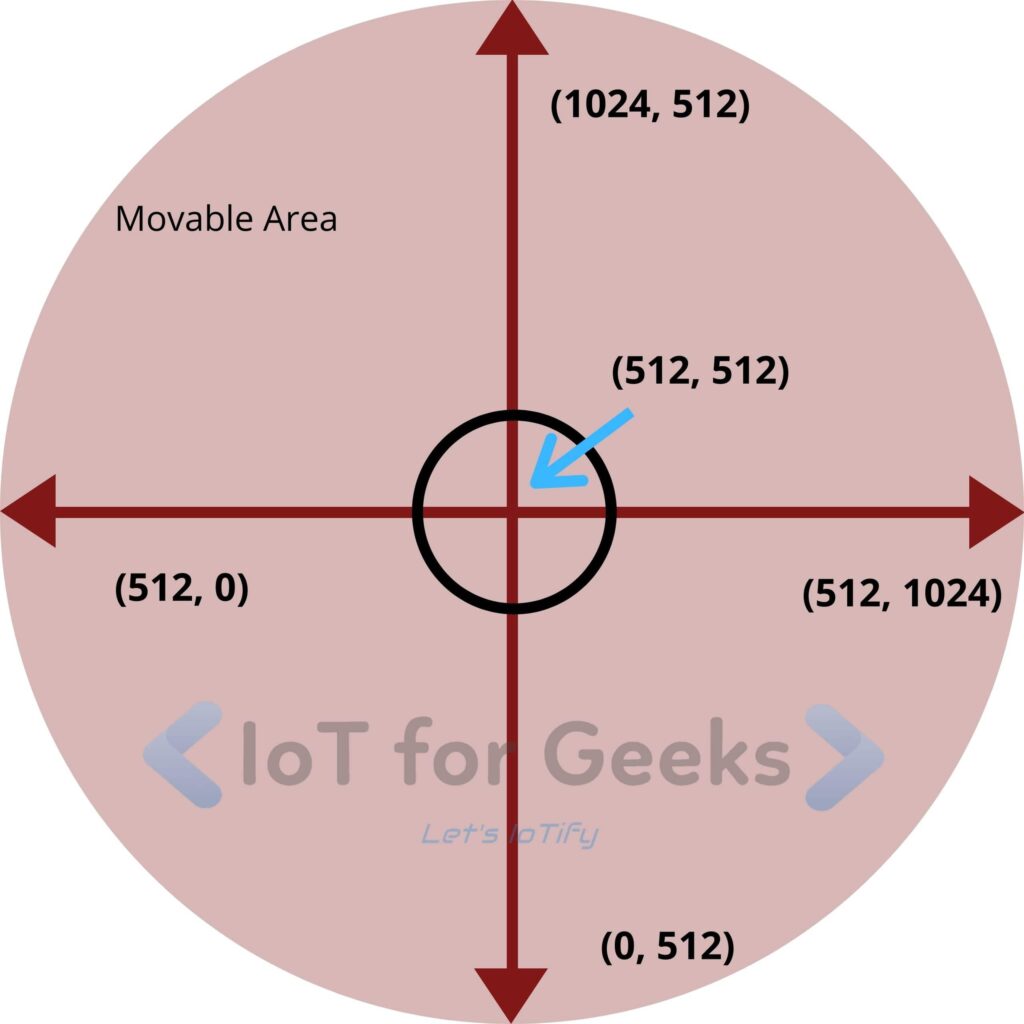
As shown in the above figure, the Joystick will give output as analog (512, 512) as (x, y) for the central position. Different values of joystick output are shown in the diagram. We can make use of these values of X and Y to determine the position of the joystick.
What are Servo Motors?
In short words, Servo motors are linear actuators. It has the ability to carry out linear motions. The performance of these motors depends on their accuracy, torque, and speed. We give rotation angle as a command to this motor to carry out the specific actions. In the case of Arduino, there is a special library available for servo motor. Just include the library and you are good to go. Before we need to take a look at the pinout of a Servo motor.
Servo Motor Pinout
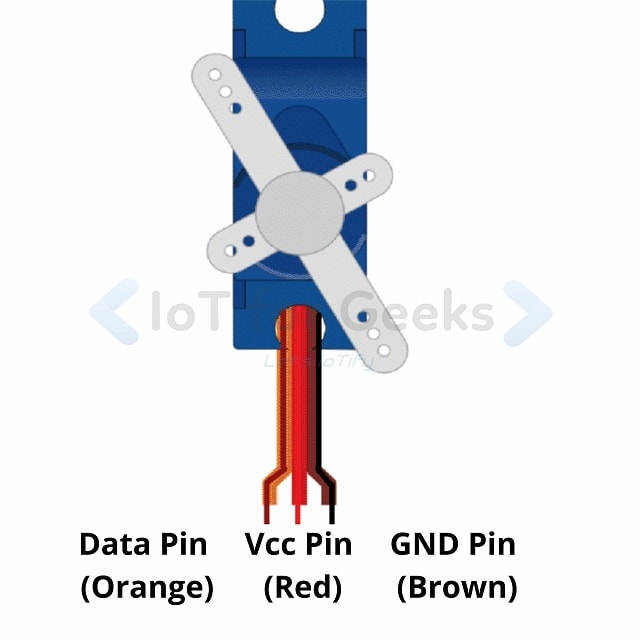
Usually, servo motors have three pins. Two for power source and one is data pin. Personally, I will recommend keeping a separate power source for external peripherals. The same will apply for Servo Motor as well. In fact, Servo will not get enough current from Arduino Board and it will not work. Hence, make sure that you are providing an external power source to the servo motor. While powering servo externally, make sure you connect GROUNDS of External power source and board. Otherwise, It may not able to get proper signals from the board.
Control Servo Motor with Joystick
We studied about Joystick and Servo motor, now we will move further to control the servo motor with Joystick. Now, we need to interface both of the peripherals with the development board.
Interfacing Joystick and Servo Motor with Arduino
As we studied earlier, Joystick will give analog output. To capture the analog output of the Joystick, we can connect the X and Y axis pin of the joystick to the analog pins. Now, Servo motors will accept PWM command and hence we need to attach servo data pin to the PWM pin of Arduino. The figure below shows the interfacing of Joystick and the servo motor with Arduino.
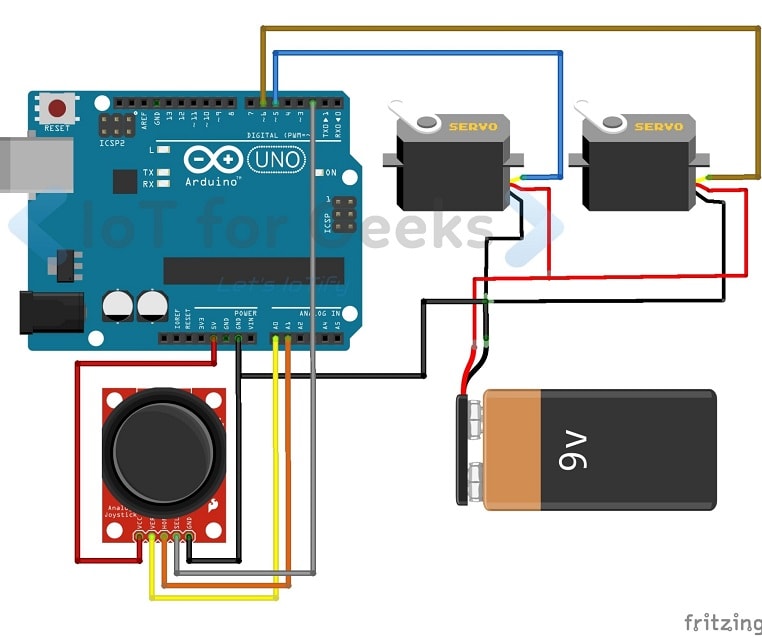
As shown in the above figure, I have provided an external power source to the Servo motors. But you should provide onboard power to the Joystick. The switch pin is optional. Please note that the arrangement of the pins of the joystick may be different depending on the manufacturer, to avoid confusion, follow the below table for connections.
| Arduino Pin | Peripheral Pin |
| A0 | Joystick (Y-Axis) |
| A1 | Joystick (X-Axis) |
| 2 | Joystick Switch |
| 5V | Joystick Vcc |
| GND | Joystick GND |
| 5 | Servo Data 1 |
| 6 | Servo Data 2 |
Arduino program to control servo motor with Joystick
Now, let’s see the program to control the servo motor with Joystick. Before proceeding, make sure you have the Servo library installed in Arduino IDE.
//For more Refer https://IoTforGeeks.com/a-guide-to-control-servo-motor-with-joystick-and-arduino-with-program
#include <Servo.h>
Servo MyServo1;
Servo MyServo2;
int Servo1_Position;
int Servo2_Position;

void setup() {
  //Set baud rate
  Serial.begin(9600);
  MyServo1.attach(5);
  MyServo2.attach(6);
}

void loop() {
  //Printing Joystick Data on Serial Monitor (You can comment the secion below if you don't want)
    Serial.print("Y:");
    Serial.println(analogRead(A0));
    Serial.print("X:");
    Serial.println(analogRead(A1));
  /////////////////////////////////////////////////////////////////////////////////////////////
//

    //Controlling Servo 1
    Servo1_Position = analogRead(A0);  //Reading Joystick Y position (Verical)
    Servo1_Position = map(Servo1_Position, 0, 1023, 0, 180);
    MyServo1.write(Servo1_Position);
    delay(15);

    //Controlling Servo 2
    Servo2_Position = analogRead(A1);  //Reading Joystick X position (Horizontal)
    Servo2_Position = map(Servo2_Position, 0, 1023, 0, 180);
    MyServo2.write(Servo2_Position);
    delay(15);
}
Still unable to control servo motor with Joystick?
Make sure, you are following the checklist below:
- Provide External Power supply to Servo Motors
- Make sure to common (join) the GROUNDs of the external power source and Arduino
- The external power supply is sufficient to power up the servos
- Proper input voltage is given to Joystick
Great guide thank you sir for this article!!