

Raspberry Pi is one of the popular development boards which is available in the mid-range. Raspberry pi is an OS-based development board and we require to install OS to use Raspberry Pi. We can perform the initial OS set up in two ways, with a monitor, and without a monitor. Setting up Raspberry Pi without a monitor is also known as “Headless Setup”.
Steps to setup Setup Raspberry Pi
Now we will set up Raspberry Pi in both ways, With a Monitor or without a monitor. As some initial steps are common, we will proceed ahead.
Total Time: 30 minutes
Download and install Essential Softwares
Now, we will need some software for the headless setup of the raspberry pi. Download the following software (for Windows).
Click to Download:
1. SD Memory Card Formatter
2. Win32 Disc Imager
3. Putty (For headless setup only)
4. Advanced IP Scanner (For headless setup only)
5. VNC Viewer (Optional for with Monitor Setup)
Format SD card
Insert SD card in laptop/PC with a card reader or SD adapter. Open SD Memory Card Formatter. Select your drive and perform a quick format.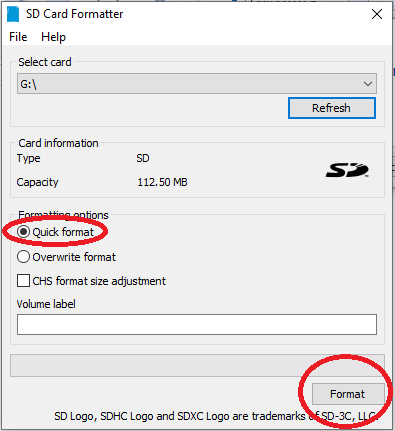
Flash OS using Win32 Disc Imager
Now, open Win32 Disc Imager, and open the directory where OS is located after extraction in Step 1. Select the OS and then click on Write. It will pop-up with a warning of the SD card can corrupt. Click ok on warning. Then the process of flashing OS will start. DO NOT REMOVE SD CARD BEFORE COMPLETION OF WRITING PROCESS. After 100% completion, you can remove the SD card from the laptop/PC.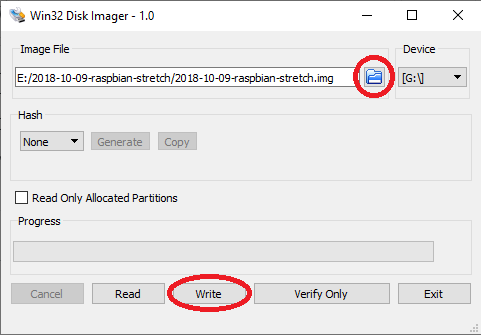
Insert SD card in Raspberry Pi and Power ON!
Done! You have just completed the setup of your Raspberry Pi. Turn it ON and follow the instructions on Monitor! First, connect it with your WiFi. So that, you can access your Raspberry Pi remotely with a VNC viewer. You can follow the next steps to find it. If you don’t have a monitor, proceed ahead for a headless setup.
Continue for Headless setup
Now, insert the SD card again into Laptop/PC. Download this zip file and extract the contents of this file. There will be only one file named “ssh“. Copy-paste this file into the SD card.
Connect Raspberry Pi with Laptop/PC and Open Advanced IP scanner
Now, first, turn ON Raspberry Pi and then connect it to the laptop/PC with the ethernet cable. Use Advanced IP Scanner to get the IP of Raspberry Pi. Open the Advanced IP Scanner, and start scanning. You can find the IP address of your Raspberry Pi.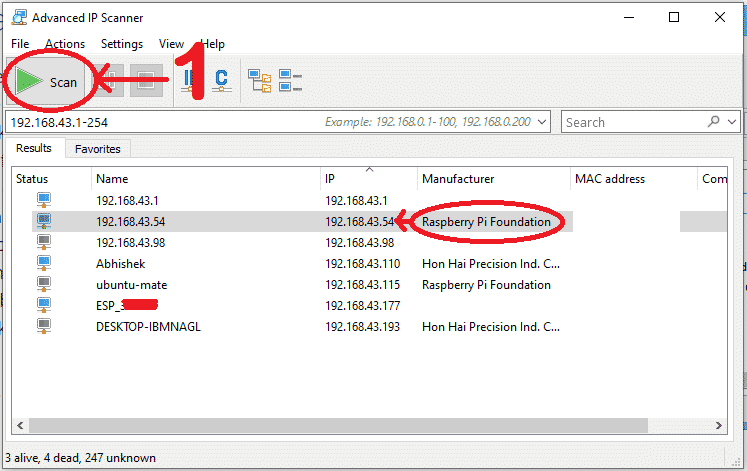
Open Putty and enter the IP address
Now, Open Putty and enter the IP address and click on open.
Login to your Raspberry Pi
After opening the SSH port, you will yet a new popup terminal window for login. Use below default credentials:
Username: pi
Password: raspberry
Please note that the password will not be visible when you type, just type and enter.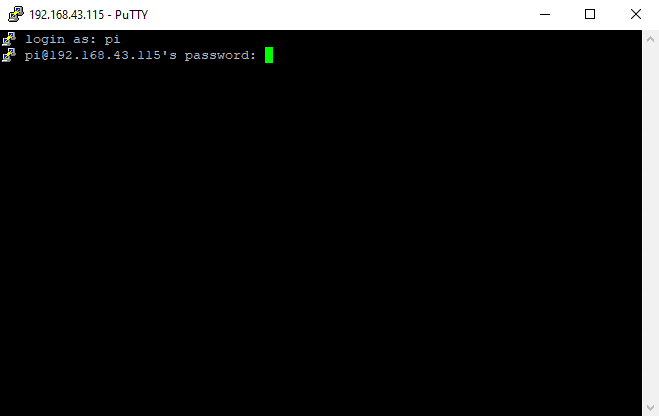
Start VNC server and view with VNC Viewer
Now, type the below command in the terminal and press enter.vncserver
After this, the VNC server will start. You will get an IP address on the terminal to access the VNC viewer.
Now open VNC viewer on laptop/PC and enter the IP address shown in the terminal. Here, you will be asked for login credentials, again you have to use the same as previous. Now you will get a new window with your Raspberry Pi Desktop. Now as a first step, connect to your WiFi, so that you will not need LAN/Ethernet cable again.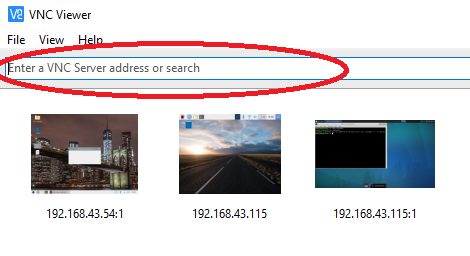
Hurrey, you just have completed Raspberry Pi setup without Monitor!
Great.. this article is really very helpful and easy to understand
Such a quick tutorial for setting up raspberry pi
I had Been using a monitor since the beginning. There were a lot of tutorials confusing about the installation process! But this one helped ! Thanks for the website actually. I checked out all your blogs! Great work Man !